How To Make A DIY Burlap Wreath
Making a DIY burlap wreath is a lot easier than you would think. In fact, I made my first wreath about two years ago. And while I have only made a few wreaths since then, it really is very easy to do. At first, I was not a fan of doing anything floral decor-wise. Fussing and fluffing is usually not my thing.
However, I was recently asked to teach a wreath making class through my Mom church group. In order to prepare a list of materials for the group, I had to make a wreath, and do in such a way that when I went to teach, it would be the same.
To my surprise, after making the first wreath for this class, I found the process very easy. In fact, it seemed much easier than when I had originally learned to make a wreath two years ago. And now that making a wreath is quite easy and fun, I’m sharing with you my process to today.
Update: I’ve since created another wreath for the Fall and you can catch my DIY video here:
You can also download for FREE my supplies list. The best part is that the list is made up of supplies that all come from the Dollar store making this DIY burlap wreath fairly inexpensive! You can also get great deals on supplies from here.
Materials:
- 14″ wire wreath form
- 24-30 pipe cleaners
- 18″ deco mesh in burlap color
- 2 rolls of wired ribbon choices that work nicely together (preferable 9 feet min. & 2 inches wide)
- 3-5 floral picks or decorative clips
- centerpiece or small sign
- Hot Glue gun and glue sticks
- scissors
How to Make a DIY Burlap Wreath
1. First, you will need to secure the pipe cleaners all the way around the wreath form. I chose to place them on the inner rings. 4 total pipe cleaners per section.
Once you have at least 24 pipe cleaners on the wreath form, you are ready to add you burlap or deco mesh to your wreath. This is the hardest part, however, it is fairly easy if you know how to make a semi-decent ponytail.
2. Gather the end of your deco mesh or burlap in such a way that it resembles a ponytail. the tail will be about 1-2 two inches. Push that small tail through the back of the wreath form, laying it down over your first pipe cleaner. Twist the pipe cleaner to secure it outer (inner) ring.
Related Post: Fall Bucket List includes Making A Wreath
Continue this ponytail method all the way around the wreath form, making bubbles of mesh or burlap as you go. Each time you make a bubble secure it to the next corresponding pipe cleaner.
3. Once you meet your starting point of bubbles, continue on a second time around moving to the next row or (inner) inner ring securing to the pipe cleaners you have not used yet.
When you finish this section your wreath should look pretty full. Your burlap mesh should almost be used up (if you had an 18-foot roll). If not, cut away any excess burlap mesh and secure to last pipe cleaner.
If you ran out, you will need to start where you left off at with a second roll. Just start a new ponytail bubble as you did in step 2.
Adding the Decorative Ribbons
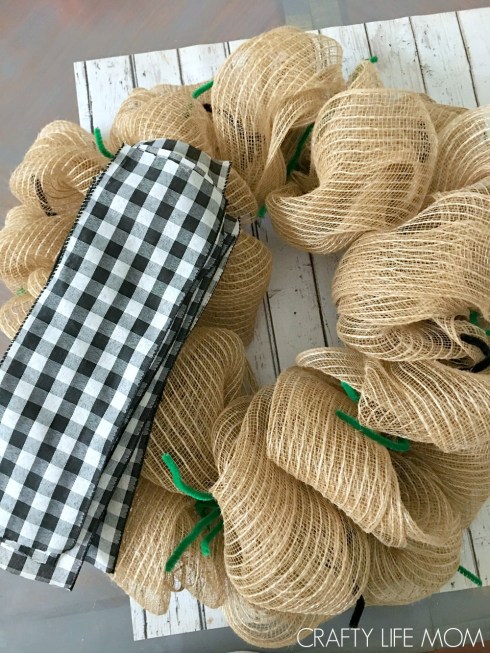
Now that the wreath form is covered in burlap mesh, you can begin to add your ribbons.
4. To do this, cut at least 12, 12inch ribbon stips. In this wreath, I did this with two ribbons that went well together. Then I secured around my wreath evenly to existing pipe cleaners.
As I worked my way around the wreath, I secured and bent down the pipe cleaners hiding the excess pipe cleaner tails into the mesh, and throughout the back of the wreath form so that they were no longer visible from the front of the wreath.
Adding Wreath Decorations
5. Adding the decorative picks to a wreath really make it pop and have a unique distinctive style. Using the 3-5 picks place them and secure with pipe cleaners. You may need to add a pipe cleaner or two at this point.
TIP: I try my best to place them over any uneven or bare sections in my wreath to cover up any inconsistency there may be with ribbons or burlap mesh bubbles. This helps to even out the overall look of the wreath. Depending on your wreath, you may only need 3 floral picks versus 5 floral picks.
6. Lastly, you will want to add any clips or centerpieces to the wreath. You can do this by securing with pipe cleaners or with a hot glue gun. You can even wrath some fall or festive fairy lights that are battery operated. I really like these to give the wreath a little something extra.
If you flip it over, you may see how messy it is. But don’t worry, nobody will even notice.
Hang it up on your door and enjoy every time you walk by that beautiful wreath!
Related Post: DIY Farmhouse Table
Hanging it Up!
I no longer hang my wreaths outside my front door. I decided that the sun faded my beautiful pretties way too much and fast. Or worse, I would end up with dead bugs and frogs (or live) in my wreath.
Yuck!
I like to enjoy my wreath, and prefer to not turn them into frog catchers! So I now hang them on the inside of my front door to enjoy! I don’t think the Amazon delivery person will care too much and every time I walk by my front door entry area I just love it.
I do decorate my front outside foyer. However, the majority of my decor is on the inside. Just a preference.
What do you think? Pretty easy right? Now go make one and leave a comment or picture showing me your creation!
GET THE FREE PRINTABLE LIST!!
New here?
If you are new to the Crafty Life Mom community, sign up below to get access to my entire private craft resource library. I keep printables for crafting projects and home decor DIYs, plus I have several SVF cut files that you can use with your Cricut or Silhouette cutting machine and checklists and more! Click the pink box below!


Comments & Reviews
Your wreath is gorgeous! How far apart to you place the pipe cleaners on the wire rings?
Thank you! I place them about 2 inches or so. I eyeball it and then do a bout 4-6 inches with the fabric loops.
Wonderful idea and the wreath looks easy to make. You did amazing job.
Thank Susan!! Yes it’s a pretty easy wreath!