DIY Dollar Tree Floral Headband
This week my class learned all about Hispanic Culture and we celebrated today during our small group time with a mini-fiesta. The kids absolutely loved it.
I wanted to kind of have an outfit in honor of the Hispanic countries we discussed and decided a floral crown would be perfect to go with this summery dress I had picked up last Spring. And it was absolutely perfect.
Not only was I able to make four floral crowns for other teammates for less than $10, but it was also a hit and inspired other teachers in other grades to do something for National Hispanic Cultural Month as well.
How to Make A Floral Crown
Now you can totally buy one on Amazon or maybe even Walmart if you catch the season right, which is fine. Ane I will be honest I almost did. I had a few in my cart ready to go. But, I thought I’d make one instead when I knew I was going to hit up the dollar tree within the next few days, so I thought better about and for the same cost plus a little bit of craft time I could have four for the price of one.
If you still want to just purchase one, here are some really cute ones.
Okay now on making the crowns.
Materials:
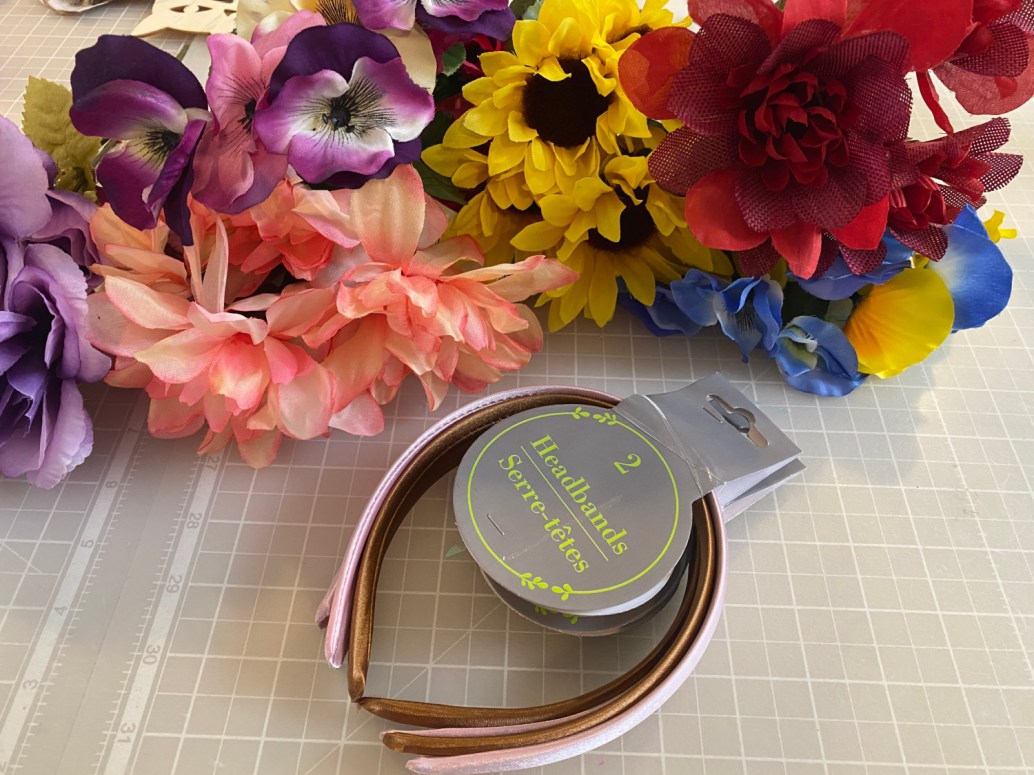
You going to need a hot glue gun, glue sticks, about four to five floral picks from Dollar Tree and one ot two packs of headbands. Each pack comes with two silt fabric-covered headbands. They have other options, but I went with these for the wide base and soft feel of the fabric silk.
Be choosey with your florals some are more full looking than others and since Dollar Tree always has a lofty amount on hand in seasonal florals you could actually make this for any time or season of the year to go with any kind of celebration or party.
I got so many compliments and everyone was quite surprised when I shared what I had made. It literally is the easiest project to do, even my seven-year-old made them with me.
Just be careful with little ones when using hot glue.
Once you have all the materials you will need to set up an area to create.
in this video to see how I have it set up!I absolutely love the Dreambox setup.It really makes crafting so much more fun!
Instructions: How to Make a DIY Floral Headband
First, begin by spreading out all of your supplies and florals. I removed mine from the stems so that all I had to work with was the floral buds of each flower.
Then layout your bigger flowers. I chose a centerpiece flower or “show stopper” flower for the middle. This would be your biggest or best one in your bunch.
Then add a left and a right flower to be placed evenly on the sides.
I then placed a few fillers or smaller flowers to fill in the space between the larger more fluffy flowers.
Begin to hot glue them into place. As you build the flowers and secure them with glue you can see gaps. Fill them in with smaller flowers. Also, tip, I laid the flower buds on an angle on their side to give them more support on the headband versus standing them up straight. This also created a look where they were more forward-facing for the floral crown.
Finishing the Crown
To finish off your DIY Floral Headband lay it flat and make sure it looks evenly distributed. I decided to add a few strips of sequin ribbons or scraps of interestig ribbons to mine to give it a little something extra.
These were so much fun to make and my daughter enjoyed the afternoon crafting with me. Heres a look at the one she did.
What do you think? It was a hit at school. Here’s a peek of me wearing it inside my classroom.


Leave A Reply!